Tuesday, November 19, 2019

NEC reflections

It's just over a week since the NEC show and I've had time to settle back down and gather some thoughts from a fantastic three days.

I covered approx 170 miles in BART the furthest I've ever driven him and apart from the indicators giving me a few issues on the way up he performed flawlessly.

I decided to keep to the A roads on the drive there and back, the weather was dry (fortunately) on the way up but cold and misty on the night drive back.  The headlight mods I performed worked well lighting up the road to an acceptable level for a 40 year old car although I found sitting so low to the ground modern car lights especially LED where blinding. Consequently I was knackered when I got home due to the concentration required to focus on the road in the face of a seemingly endless stream of on coming headlights.

The show itself was fantastic.  It now spans 8 halls and is absolutely mahoosive with all sorts of cars from the mundane to the exotic and everything in between.

I met some of the UK X1/9 owners club members and chatted for hours.  I learnt so much about the cars and about BART.  People knew of BART and some of his previous history including two separate guys who had attempted to buy him pre-renovation.

I even met Niall Julian the author of the Take To The Road article that was published when BART was put up for sale after the renovation.  We chatted for a while and may link up in the near future to do a follow up article.  Naill has published a show report here which has a picture of BART and the Prototipo car we had on the stand.  I have to say many thanks again to Andy Rowley for asking me to put the car on the stand, it was a fantastic experience.


Wednesday, October 23, 2019

Lights...Camera...Action! - An invite to the NEC Classic car show

The last few weeks have been busy.  During my internet searches for a replacement distributor I emailed Andy Rowley Chairman of the UK X1/9 owners club asking for help, he gave me some pointers and asked if I'd like to put BART on their stand at the NEC ClassicCar show!
(Nov 8th~10th)

Well, what could I say, yes please and thank you!  It was totally unexpected but welcome all the same, thank you Andy!

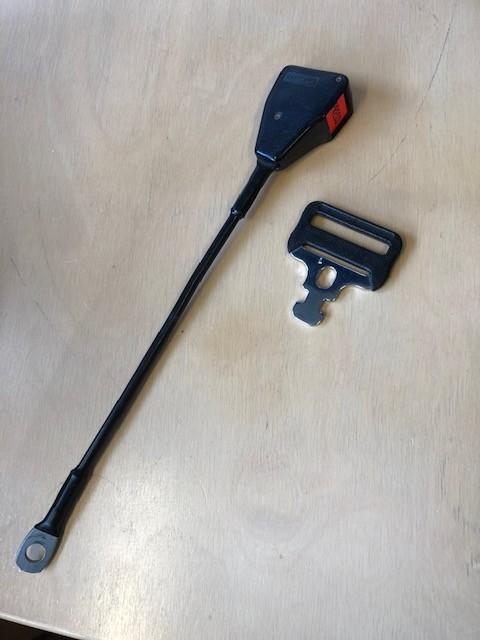
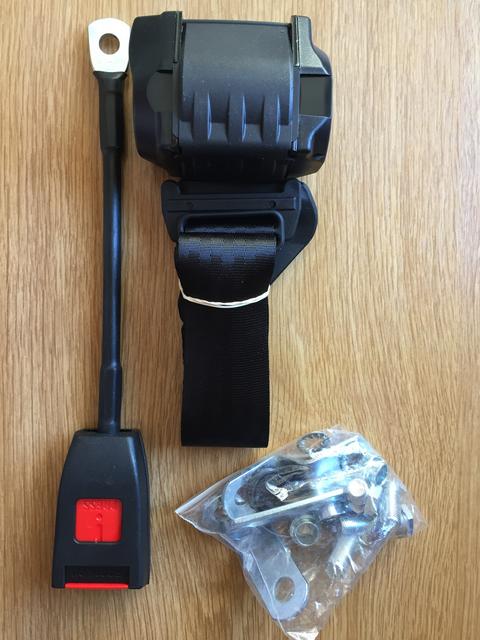
This kick started me into getting some jobs done that I'd been putting off.  I'd already done the seat belts but now needed to sort out the ignition, some issues with the headlights and a bit of cosmetic tidying up.  The plan is to drive BART to the NEC, stay over and spend a couple of days at the show, come back by train for a family commitment and return by train on the Sunday to collect BART and drive home.

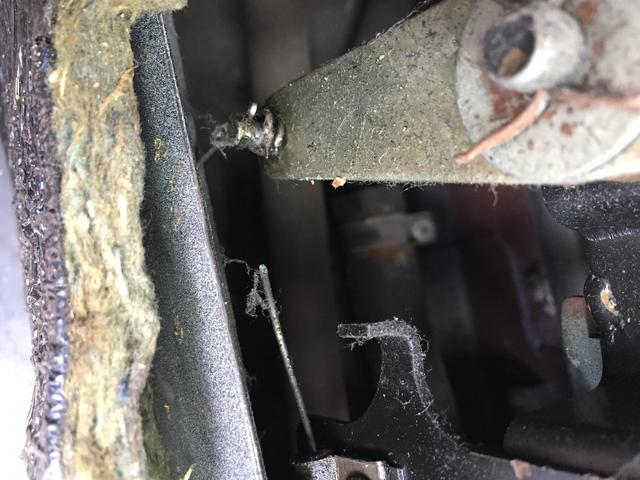
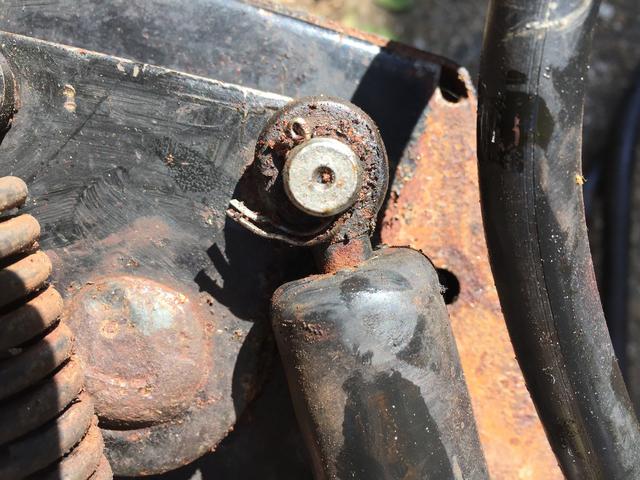
My two main concerns are the ignition issue and lighting.  The lights on BART are no better than candles, the dipped and main beam supplies are run through multiple switches and connections, I measured a 2.5v drop in the wiring supplying both headlights, that needed sorting.

Cosmetically BART is by no means perfect.  I've already detailed some of the rust areas and the paint work despite being relatively new is not the best.  The prep work prior to spraying leaves a lot to be desired but there's not a lot I can do about that short of a respray...so a wash and polish will have to do.

It seems wiper arms are no longer available new so I decided to rub down and respray the ones I had as they where looking very tatty and starting to rust, it's amazing what a coat of paint can do!  I also sprayed the rear number plate lights, these should be chrome effect but the chrome finish had long gone and they had been sprayed during the restoration but where now flaking.  No sooner had the paint dried I fell upon a company in Germany selling reproduction chrome effect plate lights!  I couldn't believe my luck and promptly bought a set!  They sure look pretty and take the car another step back to being original.

Wiper arms

Sprayed up lights

New chrome lights, nice!


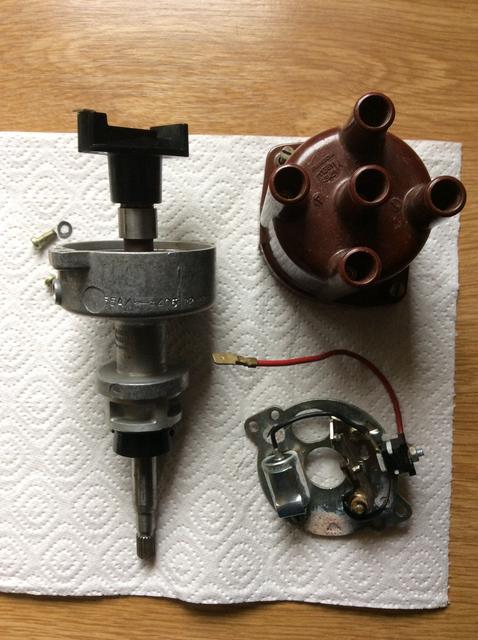
For the ignition I bit the bullet and went and bought a full Lumenition PMA50 system, thinking this would solve once and for all my ignition concerns but this got interesting.

The distributor fitting kit I purchased clearly stated it was for an S155AX distributor but it was not possible to fit it as the distributor plate has a vertical post riveted to it for the points to pivot on which was in the way of the Lumenition fitting plate and optical chopper wheel!


I called around a few places to see if replacement plates where available but no joy.  I was left with either drilling out the pivot post making retrofitting the points an impossibility or making my own plate.  I decided to make my own, this would preserve the points entirely and allow them to be refitted if necessary as a single unit even preserving the points gap!

I used 2mm Aluminium sheet using the original plate as a template.  It was then a case of drilling out the required holes, tapping two for the Lumenition trigger plate and filing / smoothing off the edges so it fitted the distributor cap.

Plate marked out, testing optical plate for fit

Cutting out

Smoothed off, grommet cutout to be done on tab

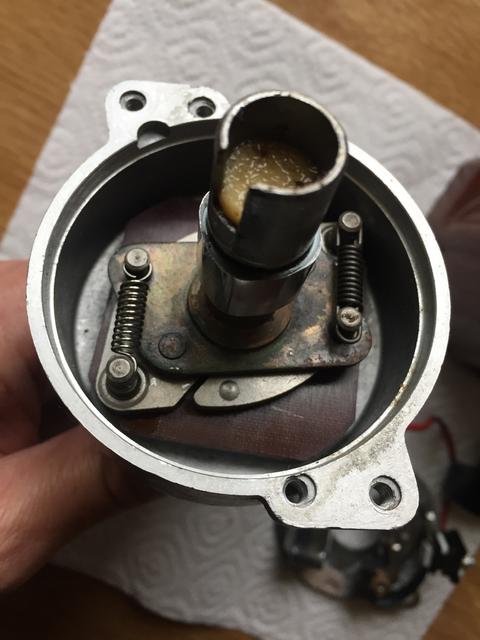
Test fit into the cap

Finished

Assembly


Back on the car

With that done the PMA50 was mounted next to the ignition coil and the distributor fitted back onto the engine.  With it all connected up I timed the engine to 10deg BTDC and fired BART up.  I hope that puts my ignition journey well and truly behind me!

 PMA50 (Silver box) mounted on a bracket near the coil


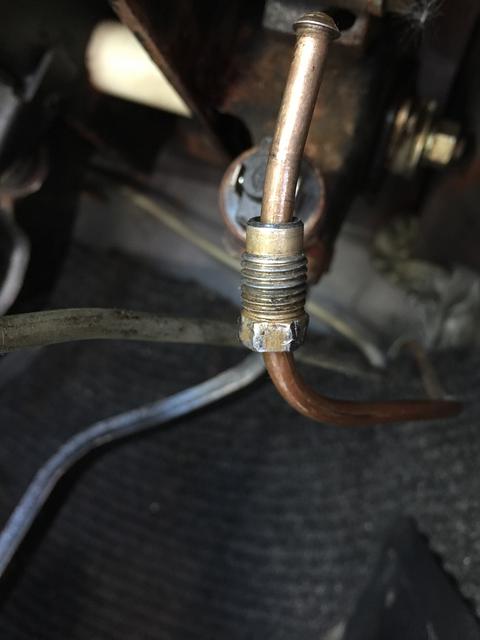
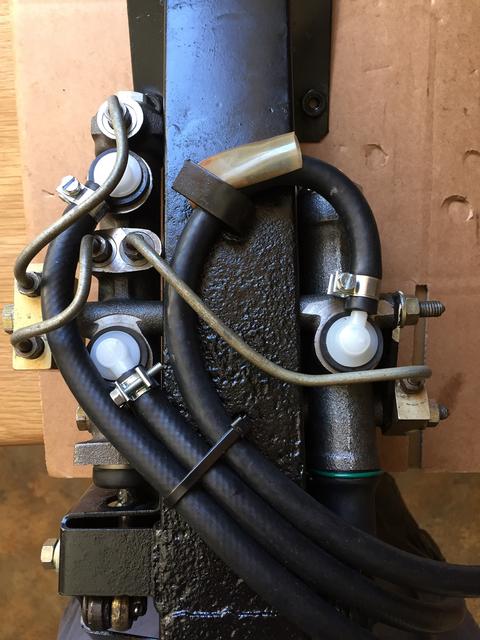
To rectify the lights I ordered 16A wire, connectors and 40A relays from 12voltplanet.co.uk.  The idea being to use the existing lighting circuit as a low current circuit switching dedicated headlight relays mounted in the headlight access bays.  The relays would then switch a high current feed direct from the battery.  This worked well, the full battery voltage was now available at the bulbs themselves improving the light output no end.  Maybe I'll be able to see at night now!

Relays mounted back to back using the horn mounting bolt, 12v 40Amp

Fly leads made up using male and female connectors and plugged into existing wiring, no cutting required!


One interesting thing I did note and which maybe common to all Lido cars is the fog lights override the dipped and main beam lights.  IE:  if the fogs are on the dipped and main beam don't work.  This took a lot of head scratching to figure out and a lot of relay swapping and circuit checking before I discovered that simply moving one wire on the fog light switch enabled the dipped and main beams to work at the same time.  It seems this may have been by design as it has been confirmed another Lido is wired the same way.


Fog light switch wiring from the factory

Revised wiring

During my testing I found the heated rear window demister relay had failed, having never used it I thought the dash bulb had blown!  Inspecting the relay I found one of the fine coil wires had burnt out, I managed to cut out the bad bit of wire and solder in link from what was left to the connector.  With that done the demister was working again along with the dash bulb!

Wire repair to demister relay (bottom left of relay)


And whilst on lighting funnies I noted the headlight flash function only flashes the dipped (Lo) beams...not the main (Hi) beams.  This seems to be by design.  I traced the wiring at the column light switch and the flash circuit is wired in parallel to the dipped beam circuit it seems from the factory.  I think I can rewire  this to make it parallel with the main beam but have not got around to doing so yet, it makes sense to me to flash main beam and not the dipped beam!


Monday, September 30, 2019

A spark in my life revisited

During my fun and games with the cam belt timing I had refitted the points as part of my fault finding.  The points replaced an electronic points replacement module from ignitioncarparts.co.uk.

With some spare time available recently, I refitted this unit as technically it's a good low cost solution to upgrading points which can be troublesome over time.  However, with the unit refitted BART developed a misfire as he, and I presume the unit, warmed up.

BART ran fine for a few miles then developed a small cough under acceleration, this got worse the further he was driven, just like a blocked jet.  I just about managed to get him home where he promptly died on the drive way.  Not thinking the unit could be at fault I took the jets out of the carb and removed the float and blew everything out.

I put it all back and he fired straight up, "aha! it's the carburettor!"......wrong!  of course he had cooled down whilst I cleaned out the carb.  Two miles down the road, cough, cough, just as before.  Back home I took the distributor out and called ignitioncarparts, the module was still in warranty and they sent me a new unit, free of charge.  Great stuff guys and 100% recommended!

A close inspection of the points module base plate and distributor mounting plate showed that neither where 100% flat.  Even though I'd used heat conducting compound between the two surfaces the mount and the plate where not touching except for where the mounting screw was positioned.  I was able to flatted the module base plate but could not find a way to correct the distributor plate, hmmmm.

I refitted the old points again and contemplated what to do next.

Whilst browsing the Eurosport website looking at Lumenition ignition units I noted some words on S155 distributors as 'typically being fitted to the Lido model'.  BART had a S135F fitted.

Curiosity started to take hold.  I asked on the Xweb forum if anybody knew of the correct distributor and what the advance curve might be but nobody had any data.  One link to an Australian  service manual though did include a distributor advance curve for the S135F.

I decided to check mine...with BART warmed up and timing light attached I mapped the advance curve and found it didn't match the one in the Aussie service manual.  In fact the curve was somewhat worrying, it stopped advancing at 5500RPM when typically for a road car it would stop at 4500RPM or lower but the total ignition advance should have topped out at 33deg +/- 2  (28 deg mechanical plus 5 deg static) but my distributor was showing 41~42 deg of advance.

Maybe the distributor is just worn, the timing marks do jump about a bit indicating some wear or maybe the springs are just weak or perhaps even replaced on purpose to give that amount of advance.

Either way I started looking for a replacement....and didn't have to look far...as luck would have it Giles @DGRally had a new old stock (NOS) S155AX for sale!  Yay!

A few days later it arrived and I promptly stripped it down, cleaned and oiled all the correct parts, cleaned and adjusted the points and checked everything thoroughly.


It's a drop in replacement in effect being designed for the Fiat 128 engine which the x1/9 uses, the only slight difficulty is the top entry distributor cap which creates a bit of a clearance issue with the bulk head access panel.  The cap has to be removed before the panel can be taken out.  When fitted though there is a finger width of clearance between the panel and cap.


I statically timed BART up and he burst into life on the first turn of the starter...phew relief!

The strobe timing light showed the correct timing at idle and with BART warmed up I checked the maximum total advance again, it was spot on 32deg and at 4500RPM!  Yes!  Result!

I also noticed BART was running smoother with a clean idle, no misfires and a steady timing mark under the strobe light.  The old distributor does have a tiny amount of play in the shaft and probably needs refurbishing.

A quick test drive reveals a bit more low down pull, not that the 1300 ever had much to start with and a bit more punch when the second choke opens up under acceleration.  Top end power seems more or less the same.  A pleasing result but Im still looking at replacing those points and will probably go for a full Lumention system at some point in the near future.

A tale of Belts, Buckles and Boots

1) Boots

The original eBay advert for BART said all 'rust cut out and made good'.  That dear readers has been proven as untrue.  We've already seen that BART hides some rust in the N/S front inner wing but he also has some in the boot, quite a lot in fact.  The boot has a false floor with a fire retardant insulation sandwiched between it and the boot floor itself.  Lifting this false floor revealed the following:


Seems all x1/9s came with this factory fitted option for free as I'm not the only one to have discovered rust in this area.  I've removed as much of the loose rust as possible and treated the floor with a rust treatment from Dinatrol.  The floor will need replacing at some point but it will have to wait.  Replacement boot panels are available from Eurosport for £100.

2) Buckles & Belts

One thing that has been bugging me (only the one!) is BART has odd seat belts.  The passenger side has a Klippan belt with trigger style buckle and the drivers side has been replaced with a UK Securon belt and buckle.  The Klippan are original fitment and it would be nice to buy replacements but after an email conversation with Kippan they can't supply the same style with a short 22cm anchor point only a much longer one:


As I have no means of shortening the anchor and remaking a safe cold weld to the anchor point eye I decided to fit a set of Securon UK belts.  Whilst not original I think I put my safety and that of any passenger before that of style and originality.


Monday, August 19, 2019

Bodgers R US

Not much been has been going on recently apart from driving BART when the weather has permitted and some maintenance in the form of a gearbox oil change...oh and a 'bumper' incident.

As you can see in pictures of BART he's fitted with metal quarter bumpers with overriders.  Apart from them being spray painted when they should be chrome (it's on the to do list to get them chromed) they look OK if not 100% original.  I was making some space in the garage and instead of starting BART up to move him I simply pushed and pulled him by hand to make the space.

By accident I pulled him by one of the rubber overriders on the rear bumper, it came off in my hand!

They are supposed to be bolted onto the bumper with an M8 bolt!  Closer inspection showed the bolt had obviously corroded and it had either sheared off or had to be cut off before the bumper could be sprayed.  Instead of correcting the issue by drilling out the old bolt or tapping a new thread the overrider had been glued back on with some sort of rubberised glue...quality!

Step forward Outwood Cars you are one class act.

Both overriders where the same.  To remedy the problem I simply filed the remains of the bolt off square and drilled a hole down the centre of each bolt and tapped it for an M5 set screw.  A large penny washer was used to spread the load and a splash of Waxoyl finished it off.  Easy to do and took an hour in total...why couldn't this have been done by the garage, shameful.

Glue


Here, the bolt has been drilled and tapped...


Mounted back on to the bumper


The feel of the gearbox has been a concern since I got BART.  The X1/9 4 and 5 speed boxes have a tendency to wear out the synchro and using the correct oil is of utmost importance to ensure a long life.  The gearbox was rebuilt during the restoration but I had a suspicion that the wrong oil had been used, Fiat specified a none EP (Extreme Pressure) oil for the gearbox and a straight SAE90 weight.

Checking the old invoices I noted a line item for a Semi-synthetic 75W-90 oil but nothing else to indicate what it was.  It was obviously wrong, so I ordered the correct Fiat recommended Petronas Tutela ZC90 (a GL-3 oil) from the great guys at Ricambio in London and swapped out the oil.  The old oil was clean but I noted on the magnetic drain plug a build up of metal shavings, maybe ok but a bit concerning for a new rebuild.

Oil draining


On the test drive I noted almost immediately an improvement in smoothness and feel of the gearbox, instead of a slightly crunchy feeling the gears now smoothly 'snick' into place.  Also, an almost straight cut gear type of whine noise the box used to make has now gone, a vast improvement.  Until next time!

Friday, June 28, 2019

A Major Ball Ache...

After our trip out to the Auto Italia event at Brooklands a few months back I wasn't 100% happy with the feel of the brakes.  I noted an increasing length of travel in the pedal and a bit of sponginess.

I decided to bleed the brakes as it was probably about 4 years since the fluid was replaced after the restoration so now was as good a time as any...what followed ended up as a three week ball ache of work.

I bled the two rear callipers just fine starting with the wheel furthest from the master cylinder....half way through bleeding the near side front calliper the mater cylinder decided that was enough of that and promptly failed.  No more ability to pump the brake pedal it simply went to the floor, dam it!

Having been through this with my 1500 X1/9 I knew what a right royal 'bar steward' of a job it is to replace the master cylinder...and all the additional work you end up doing because of 'whilst you have this apart you may as well...'

Having put off replacing the choke cable that I broke months and months ago I decided I'll do this job as well.  It involves removing both seats, passenger seat belt and anchor points, sill trim, drivers side anchor points, spare wheel well cover and lifting the carpet enough to be able to undo the handbrake assembly to get to the choke lever that is attached to it!


The replacement cable inner I bought was a touch larger than the original but it just about fitted down the outer cable with plenty of grease to help.  

Location of the choke lever.


Broken cable.


With that out of the way I could turn my attention to the brakes.  With the seat already out the steering column is lower down out of the way to gain access to the pedal box under the dash.


The space is incredibly tight under the dash, there is very little room to manoeuvre and you need to be quite flexible to get in!  At this point as I was undoing the fixed brake lines I noted the unions seemed to have been worked on by the previous hamfisted gorilla mentioned in other posts.


As you can see space is very tight...the corrosion was unexpected!  At this point I decided that I didn't trust any of the previous work and would replace the clutch master cylinder and reservoir hoses at the same time and fully service the pedal box.

With the box eventually free from the car I could assess the damage.  The pictures speak for themselves, incorrect sized clips for the pipes, rounded brakes unions, corrosion of the pedal box, seized clutch pivot bar, incorrect routing of hoses, a kink in the brake reservoir feed hose (potentially lethal), along with a stripped thread in the four way connecting block, how this wasn't leaking before hand I don't know.  I had to obtain a replacement block from x19spares, I also cut off the brake pipe end flare, replaced the butchered union and remade the flare... 


I replaced all the reservoir hoses and used the correct sized clips.  The pivot shaft proved to be stubborn but eventually relented so I could remove it and grease it correctly.  I treated the rust and painted the box, fitted new brake and clutch master cylinders and routed the hoses correctly over the top of the box.


Refitting the box went smoothly although the routing of those reservoir hoses is a challenge, with everything reconnected I set about bleeding the brakes, unfortunately I noted a leak from the crossover brake line that runs over the top of the box.  Luckily you can drop the box just enough to get to the unions to remove the pipe.  I made up a replacement and fitted it.


Finally I could now bleed the brakes, clutch and put the car back together but the car was about to throw me one last curve ball...the clutch slave cylinder started to leak....I mean What!?  It was fine previously but now decided it was time to fail...I placed an order on Eurosport-uk for a new one and flexihose, fitting went ok but it added another 3 days to the work.

New slave in place.


So why do the master cylinders fail like this?  It probably comes down to corrosion.  Brake fluid is hydroscopic it will take moisture out of the atmosphere and if it is not replaced on a regular basis say every two years, it can cause corrosion to parts of the brake system.  This is one possibility, another is that the brake piston and seal inside the master cylinder operate over a very small range of travel and over time and use the seal and cylinder bore create a wear pattern a bit like pistons in the engine wearing into the bore (running in)  IE they bed in.  

When I came to bleed the brakes I took the piston and seal past the normal range of operation by pressing the pedal all the way to the floor probably into a part of the cylinder bore that wasn't smooth like the bedded in part or maybe part of the bore that had a small amount of corrosion.  There may have been small bits of debris in the cylinder as well, this extra travel of the seal probably tore the edge of it allowing fluid to bypass it or it could have picked up some debris and tore that way.

Whatever the case, I will now pressure bleed the brakes and clutch and will make sure to replace the fluid every two years!