Sunday, August 6, 2023

A long overdue update...

It's about time I updated what has been going on with BART after the head gasket failure last year.  I decided I was going to take my time and repair BART properly so I set out and sourced some tips from the XWeb forum.

I tore down the head and checked for flatness, checked for bent valves and inspected the valve seats and guides.

As it turned out the head was flat at less then 2 thou out of true but I elected to get it skimmed by 4 thou just to be safe.  The machine shop who did the work checked the guides and seats and found them to be OK but I elected to install new valves and springs after discovering Cylinder number 1 had a bent exhaust valve!

Old Valve uneven lapping marks

Not seating correctly = bent

It wasn't bent that much but needed replacing so all the valves where replaced as a precaution.  New head bolts and studs where used as well along with new valve springs and shims.

The key points to performing this job well where to ensure the valves where lapped in properly, getting the head skimmed and ensuring the block is flat and cleaned.

I cleaned the block with Stanley knife blades and used a spiral bottle brush on the end of a drill to clean out the head stud and bolt threads in the block.  The goal to be able to screw in the studs by hand with out any stickiness or grit on the threads, this helps achieve the correct torque for the cylinder head.

Also important was to ensure the two head locating bowls sat correctly and where not so tall as to prevent the head from seating down fully.  One of them had indeed deformed and was preventing the head from seating so both where replaced.
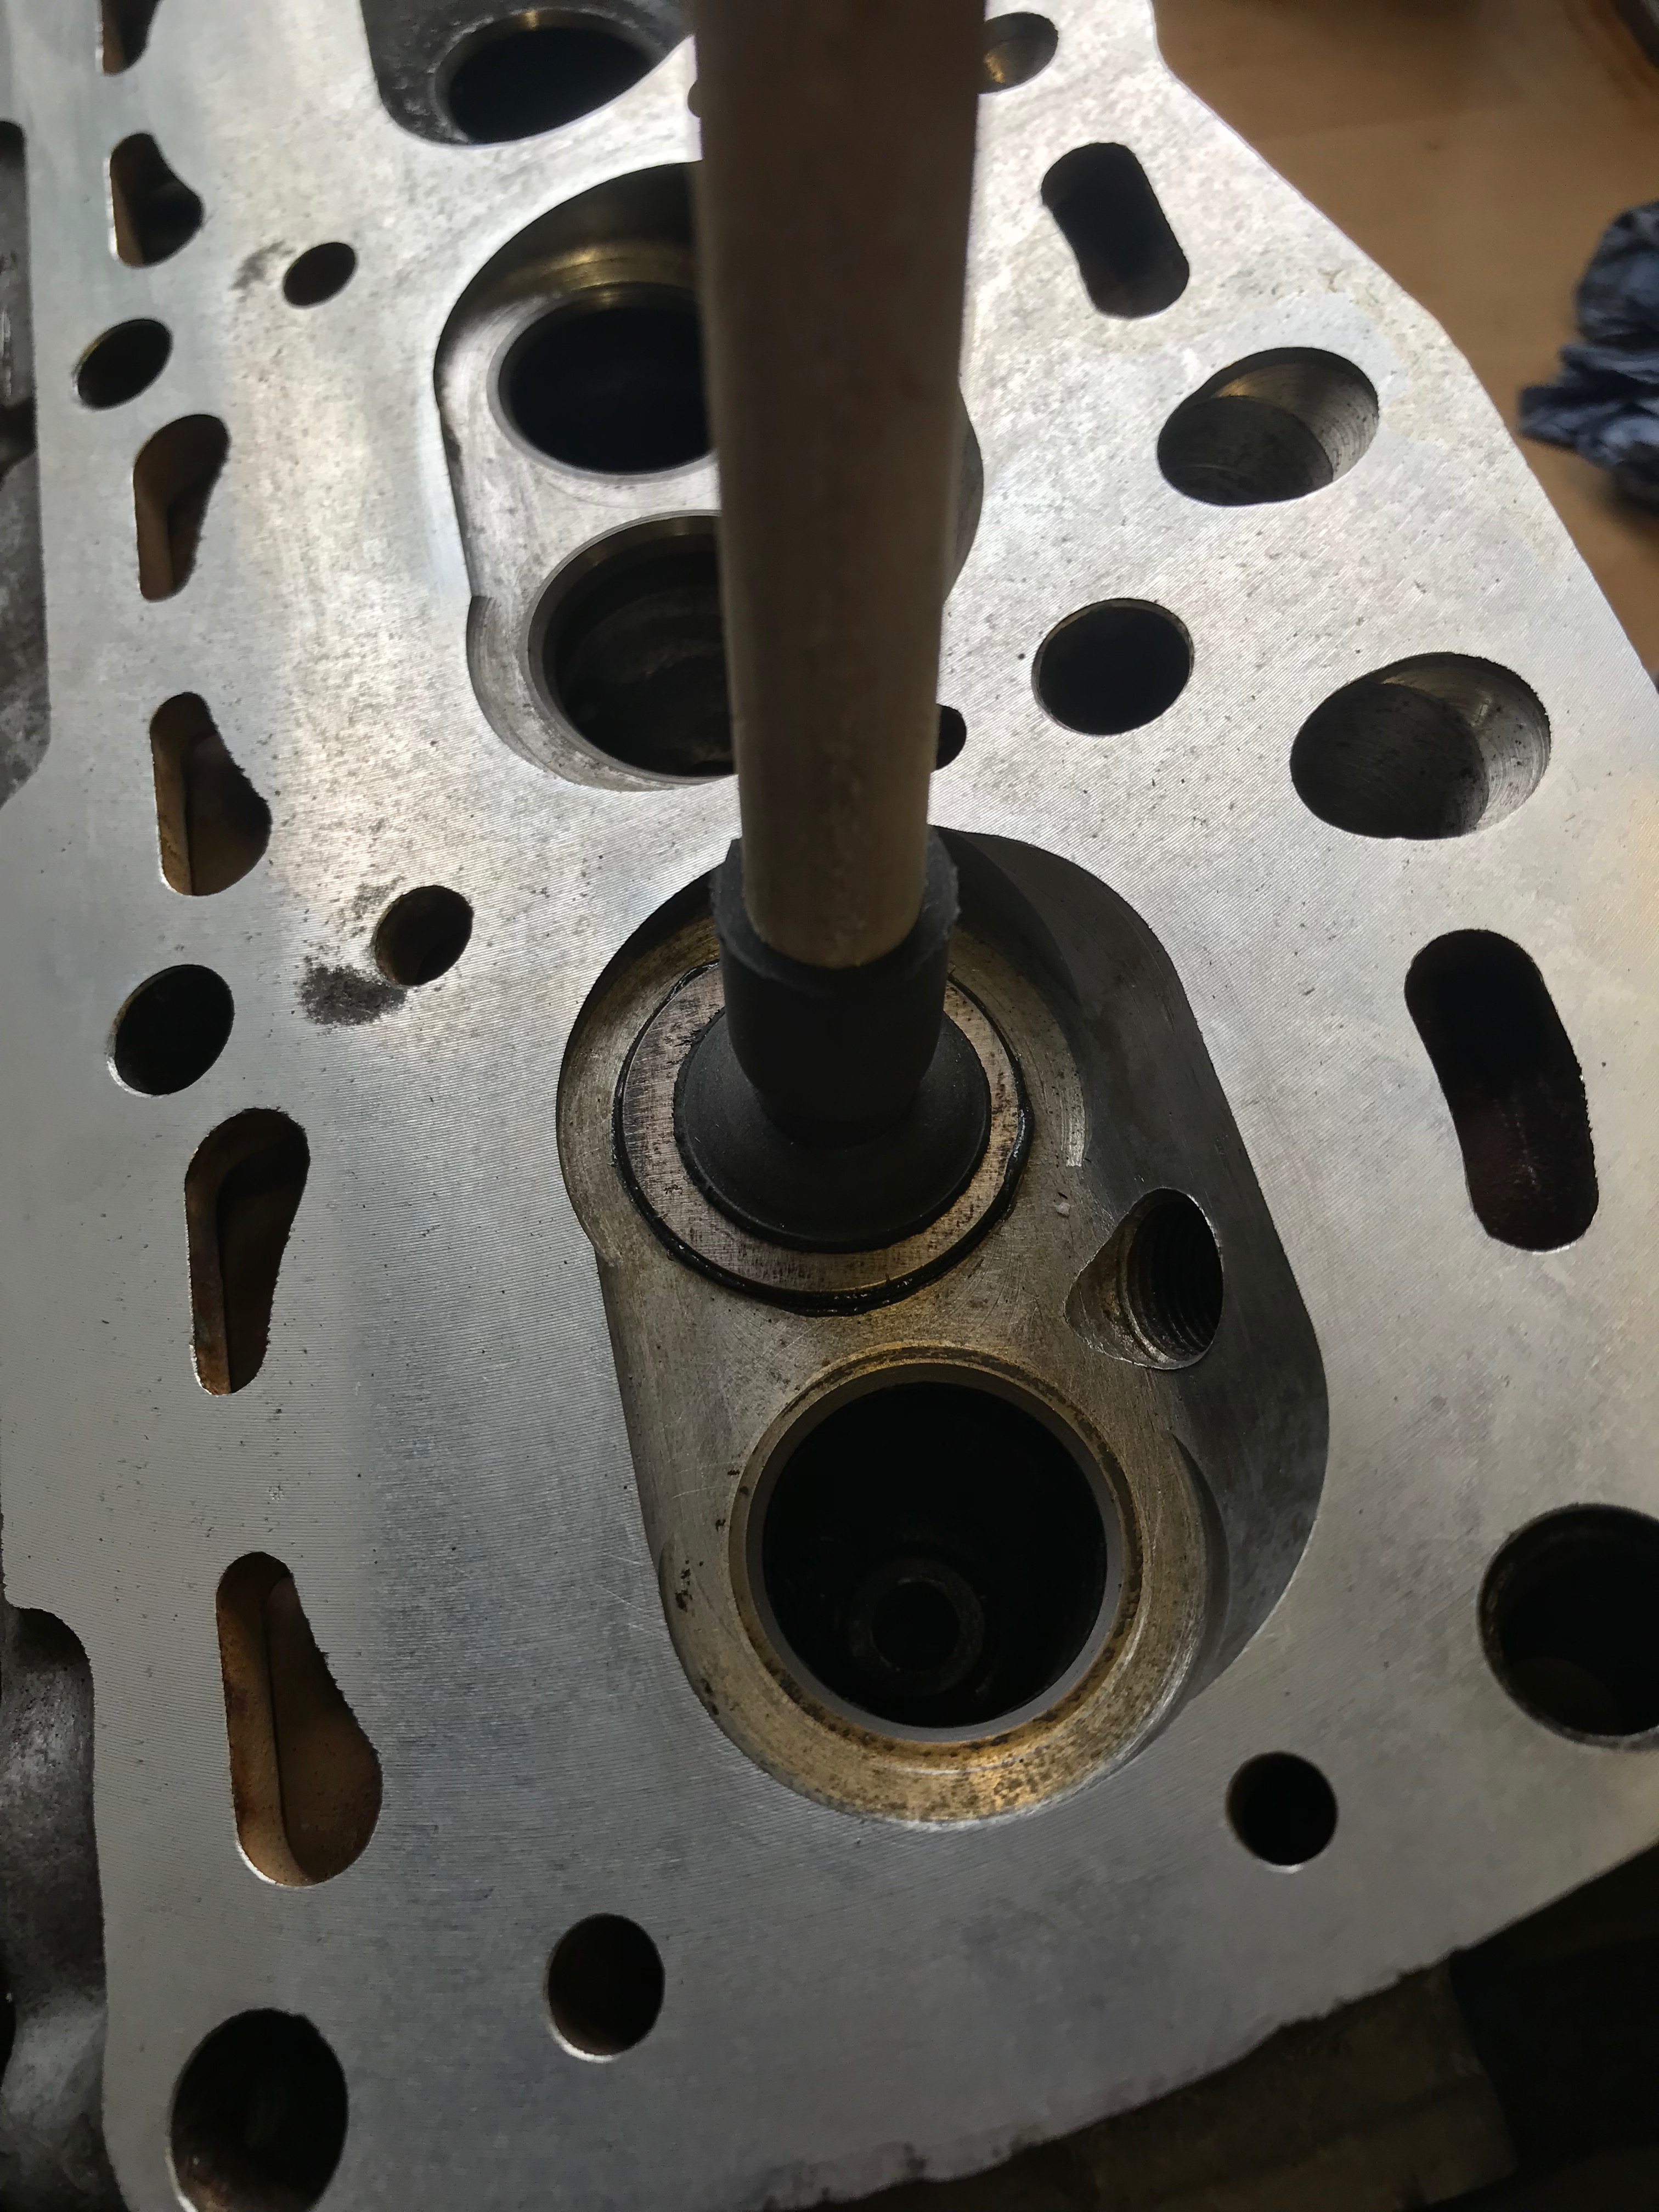

Valve lapping the old fashioned way

Skimmed, new valves and springs

Cleaned block and pistons with gasket and studs read to go


Locating dowls needed replacing

I used ARP assembly lube on all the threads, I highly recommend this as it helps achieve even torque across all the bolts and studs.  Also, lube under the nuts and on top of the washers where there is a turning friction force, again to achieve even torque.

It is possible to complete the initial torque sequence with the camber off the head without any special tools other than the torque wrench but with the cambox fitted you need to use an extended offset ring spanner (Continental Engine base spanner)  Luckily these are available here: 

https://www.lasaero.com/products/article/Q01GIQ979

These work perfectly, I required the 3/4" or 19mm spanner

I torqued the head down in three stages (29 / 47 / 69 lb-ft) following the FIAT recommended pattern.

I took the opportunity at this time to replace the water pump and replace the alternator wiring as it was looking very crusty with poor connections.  I installed new alternator brushes and a new timing belt.

New Water pump and cleaned up alternator

After everything was back together I refilled with coolant and changed the oil for good measure.  BART started first time!  I ran him up to temperature and drove around the block for a mile or two and then put him back in the garage and waited 24hrs.

The initial heat cycle and retorque is key to ensure the head gasket seats correctly.  Heat cycle the engine once, let it cool to stone cold over 24hrs then retorque.  Do this by backing off individually a head bolt by 1-2 flats (90deg) and then retorque immediately IE: one bolt at a time in the correct sequence.

Another tip is to mark the nuts and bolts so as you have a reference of how far down the gasket snugs following the torque cycles...


Use engineering marker pen, dab on the stud and nut

With that done it was now OK to drive BART for a few hundred miles before the third and final torque sequence; doing exactly the same as above, back the bolt off immediately torque to the correct spec.

The few hundred miles I needed to put on BART before the final head torque took on a bit of urgency as I was contacted by the UK X1/9 owners club if I would like to display BART at the NEC classic car restoration show in March.  Having attended the NEC show in November with BART before I jumped at the chance for the March show and made plans.


On the stand with BART


Since March BART has been running fine there seems to be a touch more power after the head gasket replacement.  Next on the list will be addressing a layshaft bearing issue in the gearbox and getting the distributor advance curve remapped, which is another story.

Tuesday, November 15, 2022

2022 Reflections and Ups n Downs

With 2022 drawing to a close and Christmas just over a month away I realised I've not posted anything at all this year...so whats been going on?

Back in April I was asked by the UK owners club if I would like my car featured in Classic Car magazine as part of the 50 years since launch celebrations of the Fiat x1/9, of course I said yes!

Contact was made with the Journalist and I spent a very enjoyable day with her and the photographer driving BART to the limit and chatting about cars!

Other magazines reviewed other versions of the x1/9 and came out all within a few months of each other.  Myself and BART appeared in the July edition of Classic Car Magazine...and yes thats a face of utter concentration!

On test, following inches behind the camera car!

In late August the UK owners club held their national event at the Silverstone Classics event, it was a three day event but we only attended the Friday mainly due to the cost, however, the benefit of attending the Friday was we got to drive the full Silverstone race circuit in convoy!  I think we had 15 cars on the day and drove a lap with the Ferrari Owners club following behind.

The pace car upfront kept the speed down but we still managed to drop back a few times and gave BART the beans around a few corners for a bit of fun.  It was all over too soon but a great memory to take away.

Waiting to be let onto the track

X1/9s at Silverstone!

In October I got a message from Andy Rowley, Chairman of the owners club, if I'd like to display BART again at the NEC Classic car show in November, of course I would.  BART was in good health (or so I thought) I had been driving him a lot on many sunny weekends we enjoyed during this years summer...

...with about 6 weeks to go to the show on one trip out I was giving BART the beans again up a local lane used for hill climbs when he started to run rough.  I felt the engine change in feel and note just as I got to the top of the climb.  The idle was bit rough and there was a mild vibration when pulling away...hmmmm.

We where some miles from home so I gently eased him home noting the symptoms where getting worse.  When home I did a bit of fault finding and ruled out carburation and ignition...I removed the plugs and checked the colour, all seemed OK.

Suspecting the worst I then did a compression test and...oh dear Cylinder 2 and 3 where well down on 1 & 4.  BART had blown a head gasket, darn it.  Realistically their was no way I would be able to attend the NEC, I had too much going on and not enough time to devote to getting BART ready in time.

Gasket blown between 2 and 3

So, at the time of writing BART is still in bits, the cylinder head has had a cleanup 4 thou skim (it didn't really need it but was done as a precaution), I'm replacing all the valves, one was oddly bent by a small amount, and will be fitting new springs.  The guides are fine, I had them checked by an engineering shop but I do need to get the alternator refurbished, oh and I'll replace the water pump as well whiles I'm at it!

There's always something to do!  I'll update the blog as I slowly work my way through the rebuild...Merry Xmas!

Monday, September 27, 2021

UK Owners Club National Event September 2021

We attended the UK Owners Club National event on September 10th~12th in the Brecon Beacons, South Wales.  A weekend of great driving and fun.

The event was really well organised by Rob & Charlotte who had meticulously planned the weekends events, a huge thankyou to them as it could not have been easy to do and must have taken them days of work.  Great job!

We had booked a Caravan at the Lakeside Caravan Park (https://llangorselake.co.uk) along with a bunch of other club members and our plan was to set out around 11:30am on Friday 10th and meet up for a drink around 6pm.  Our route would take us out to Thame and then onto Oxford to pick up the A40 and follow it all the way to our destination.  

Along the way I had booked us in for lunch at the The Royal Oak, Burford.  A beautiful stone built pub off the main street of Burford which has some nice beers on tap and a great selection of food, well worth seeking out.

The traffic around Oxford was a nightmare and it took us longer than we had hoped but BART coped with it well and didn't overheat!  After lunch we headed back out and made good progress until we got to Monmouth where we faced a 30min traffic jam.  The Satnav took us off the A40 at Huntley to cut the corner via the A4136 but by the time we realised the amount of traffic trying to cross the River Wye we where stuck.

After that hick up we picked up the A40 again and made it to our destination, a little late but relieved!

BART and Caravan

The following morning we all gathered for some photos and coffee to clear our heads after the night before and get prepped for the days driving.  Rob had worked out routes over the Black Mountain pass for the morning and an afternoon run that would see us all end up in Brecon in the afternoon.  A meal had been organised at the Caravan park for the evening and a bit of light fun with a Quiz and chat afterwards.


Curious Swan

24 cars attended in total with only one suffering a mishap with some serious engine issues.  The Black Mountain run was spectacular, there is a short video published at the bottom of this page and an action shot of BART: photos.app.goo.gl/jwn9BELJUEM9SSNf7  and more pictures here: https://www.x1-9ownersclub.org.uk/forum/4-news-and-views/31657-the-brecon-national-a-few-pictures.html

For the second day there was a more gentle and less frantic drive out to the Elan Valley reservoir and lunch at the Penbont Tea Rooms.  We all met up at the visitors car park where for a bit of fun we all voted for their favourite car and cleanest engine.  I was incredible surprised and bowled over when I was told BART had won the favourite car section, thank you guys!


At Elan Valley Rob had arranged for Youtuber 'HubNut' to meet up and review one of the x1/9s.  To say he was impressed would be an understatement his video can be seen on the following link and also the convoy of x1/9s:  https://www.youtube.com/watch?v=pzyIOMfSNPg

Its probably one of the best reviews of the x1/9 on the internet.

After lunch we parted ways with everybody heading home.  We covered 457 fun (well mostly) filled miles and averaged approx 40mpg despite some hard driving.  Many thanks to the owners club committee and especially Rob, Charlotte and Juliet.


The Prep - UK Owners Club National Event

A few weeks ago (10th-12th September'21) we attended the UK Owners Club National event in the very beautiful Brecon Beacons.  It was a fantastic few days of great driving,  food and chat but more of that later...to get BART and our selves to the event I needed to do some prep.

First off I changed the oil and filter as it was due anyhow.  I also wanted to sort out an issue with the front brakes; they weren't inspiring confidence in me and I had started to note a slight steering wobble under hard braking which I suspected was a warped disk.  I had some new spare front disks and pads so swapped them over making sure everything was clean and the calliper sliders greased with hi-temp goo.

That sorted the brakes, the pedal was firmer and stopping power increased.  Next was to do a few rust treatment and prevention jobs as well...it's Wales after all and sure to rain!

I purchased a food syringe and tube off eBay the idea being to inject Waxoyl into parts of BART I couldn't directly access.


The areas to tackle where the leading edge of the Frunk, it had started to show signs of rust, the leading edge of the engine cover, the R/H side of the engine 'well' under the vent and for peace-of-mind the inside of the A pillars.

The A pillars where straight forward, if you remove the Targa front sealing rubber (two screws) it reveals two holes above each sun visor that are large enough to squirt Waxoyl into.

A bit difficult to see but the holes are there!

I diluted the Waxoyl with White Spirit to the consistency of Tomato Soup and injected about 100ml into each pillar and along the windscreen top.

Next I tackled the engine cover and 'well'.  This was best done by removing the engine cover.


I treated the rust then squirted diluted Waxoyl into the cavity sloshing it about and then left the cover overnight to dry out.  The R/H engine side 'well' was tackled next.  I hadn't realised this was in a poor state, some previous welding and repair had been done before but cosmetically it didn't look great and really needs to be done again.

I removed all the loose rust I could and vacuumed the area then I treated everything with a rust killer and preventer.  When that was dry I painted Hammerite over the area and after drying Waxoyled the lot!


The rear cover mounting screw seemed to have been cross threaded at some point but some quick work with a tap fixed the thread so it was all good.  The last bit to do was the Frunk leading edge which had stated to split on the inside.  Again I treated the area with the rust killer and then applied Waxyol directly and also injected some into the Frunk box cavity frame and U channel.  Hopefully that should be good enough to stop the evil rust from coming back!

Rust just starting to rear its ugly head on the Frunk lid.

Next:  The event itself!

Thursday, August 19, 2021

Swish, Swish...

If you are familiar with Chris Rea you'll identify the sound of windscreen wipers clearing the windscreen of a car in the dark and moody opening of his track 'Road to Hell'.  Windscreen wipers working as they should despite the slightly depressing theme!  Unfortunately for BART this was not the case, not even close.  The wipers barely moved, stuttering slowly across the windscreen as if trying to clear away treacle or some other thick and gooey substance, switching to high speed made no difference.

With the UK x1/9 Owners Club annual event due to take place in Wales this coming September I thought it was time to address the problem.

Like the headlights, the wiper power feeds run through multiple switches and connections and as I discovered with the lights the combined losses of the wiring caused a drop of 2.5v.  The solution was to install some make and break relays to switch a high current feed directly from the battery taking the load off the original wiring and connectors.

BART has two speed wipers so I ordered 2 relays from 12voltplanet.co.uk plus relay holders and a fuse holder.  These all clip together making for a neat installation.

Fuse Holder:  https://www.12voltplanet.co.uk/standard-blade-fuse-holder-with-terminals.html

Relay Holder:  https://www.12voltplanet.co.uk/standard-mini-relay-socket-with-terminals.html

The relays where 40amp 5 pin change over relays or you can use 4 pin make and break relays, either will work.  All the wiring and fuse where 20amp rated.

I started by removing the drivers side scuttle grill and separating the wiper motor connector.  You need to locate the Grey (high speed) and Red (low speed) wires and remove the connectors from the plug (female connectors) by sliding a very fine screwdriver into the small square cutout of each terminal.  These will now control a relay each to switch a fused feed from the battery.  

I used a spare two terminal connector to connect and extend the Grey and Red wires into the Frunk via the bulkhead wiring grommet connecting up to the relay block on pin 86 of the relay.  Pin 85 of the relay is the ground pin and I daisy chain connected them together and found an earth on the bulkhead grommet studs.

A feed then needs to be taken from the battery and connected via the fuse block to pin 30 on each fuse, again I daisy chained the connection.  Pin 87 (normally open) from each relay then becomes the output (high current feed) from the relays connected back to the wiper motor using the existing OEM connector.

This shows the earth tag to Pin85, the relay block connected together, the battery feed and wiring to and from the wiper motor connector.


Wiring completed in the scuttle.  The return wiring to the motor requires female connectors with tags


I finished off with some spiral wiring wrap to neaten everything up.  The result...Wow, just like the headlights the difference was night and day.  Even on a dry screen the wipers move quickly and smoothly traversing without stopping or stuttering, result!

Wiring diagram (click to expand):


Friday, July 23, 2021

My Boots are leaking!

After the camshaft swap saga it was time to see how BART ran on the road and bed in the new camshaft.  I went for a short rev. limited 5mile drive to get him warmed up and to see if there where any issues.  

Back home all looked OK, no leaks from the new seals or gaskets and the cam belt was still running in the same place on the auxiliary pulley, however, I could smell burning oil.  

A quick look under the car revealed...


The long drive shaft inner boot was leaking...badly.  Enough for the oil to fly back on to the exhaust causing the smell.  I also managed to burn my forearm on the exhaust whilst taking the picture adding to the smoke!

I had anticipated replacing the inner drive shaft boots and had already purchased the parts so now was as good a time to do the work as any!

The long drive shaft has to be removed from the car to replace the boot, the short one can be done on the car.

The first job was to undo the axle nut on the drive shaft and then get the rear of BART up in the air on axle stands.


Then it's necessary to remove the brake calliper and tie it up out of the way.  With that done undo the hub to strut bolts leaving one in place for now and then undo the three small bolts that hold the inner boot retaining plate to the gearbox.  Access to these is tight with the lower engine mount and cross member in place but can be done with a 1/4" drive socket and extension.

I use adjustable camber bolts on the top retaining strut bolt so marked the relation of the bolt head and tab to the hub with a marker pen, this should mean that I'll get the camber just about spot on during reassembly.

I noted the piston dust cover on the calliper had perished but these are easy to replace, they just pull out and the new one slipped over the piston, make sure the cover fits into the groove on the calliper.


Somebody had already been here on BART and replaced two of the small bolts with studs for the retaining plate, not a bad idea but the third bolt had been replaced with a different sized 12point bolt....


Of course I didn't have a 12point socket so had to purchase one from Amazon! It came the next day and I was able to undo the last bolt.

With that done place a very large drip tray under the gearbox and pull the boot back away from the gearbox.  A large amount of oil will issue forth!  Line up the Tripode drive bearing with the cutouts in the gearbox then remove the last hub to strut bolt and separate the two.  Push the A arm down and carefully ease the splined shaft from the hub, it has to be pushed a fair way down but will clear the hub.  With that done you can now gently remove the drive shaft from the gearbox.


One Driveshaft

With that done I could now remove the Tripode bearing, and boot, replacing with new parts.  The Tripode is held in place with a circlip and then simply slides of the drive shaft.  As I removed the boot I noted evidence of the boot being replaced previously as the old inner seal was still on the shaft and the current one simply fell out of the boot!

Boot, Retaining plate and Tripode bearing

Two old inner boot seals

The new boot was purchased from Eurosport-uk and was of a different design to the old.  It was smaller and didn't seem to have the removable seal feature of the old ones, I hope the design proves to be better at keeping the oil in the gearbox! 

New Boot (Right) and Tripode bearing

Replacement is the reverse of removal, just be careful not to damage the Tripode bearing when inserting it back into the gearbox.  The bearing only fits one way on the drive shaft and if fitted the wrong way you won't be able to install the circlip.  With the shaft installed and the hub, strut and shaft all joined back together I fitted a new axle shaft nut and replaced the brake calliper.  With the handbrake on this was torqued up to 100lbft.

The short drive shaft boot can be replaced on the car, it wasn't leaking but as I was here it was best to do both.  Same procedure except the axle nut doesn't need to be removed and access to the boot retaining plate bolts is easier.  Remove the calliper (I replaced the dust boot here as well) and disconnect the strut from the hub.  Pull the boot back and line up the Tripode to the cut outs as before.  Then push the A arm down and the shaft should pull out of the gearbox.  It's a little tight on space but the end of the driveshaft can be swung towards the rear of the car to gain access to the circlip, Tripode bearing and boot.


Reassembly is the reverse of removal again, make sure the area where the retaining plate bolts to the gearbox is clean and that no grit made its way inside or onto the Tripode bearing, it is a precision part.  Unfortunately the marks I made on the adjustable camber bolts rubbed off and I had to guess the position during reassembly!  This meant another trip to Blackboots in Chesham to check the alignment doh!  The last job was to top up the gearbox oil.   A short test drive later and no leaks where detected...so far.  I'll keep my finger crossed this is one job I don't have to revisit soon.